Monday 24 December 2018

A Visit to the Tamiya Plamodel Factory in Tokyo, Japan

Recently, the missus had to go on week-long work trip to Japan. And because of her hectic schedule, she didn't have much free time to roam the streets of Tokyo for some shopping. But as luck would have it, she did manage to make an unexpected trip to the Tamiya Plamodel Factory in Tokyo. While there are probably better deals to be had in hobby shops in Akihabara, the Tamiya flagship store presumably has a wider range of its own products. Regardless, it's an awesome shop in its own right.

Tamiya Plamodel Factory in Tokyo, Japan

Being a spur of the moment decision, the missus only reached Tamiya's store rather late in the evening. So with closing time not too far off and a need to make the last train out of Shimbasi District where the store is located, she began sending me quickfire photos of Armored Fighting Vehicle (AFV) model kits. Her question ... was there anything I wanted? For a moment, I just froze. My mind blank, unable to really process the multitude of Tamiya model kits on display.   

Behind the main display window of the Tamiya Plamodel Factory in Tokyo
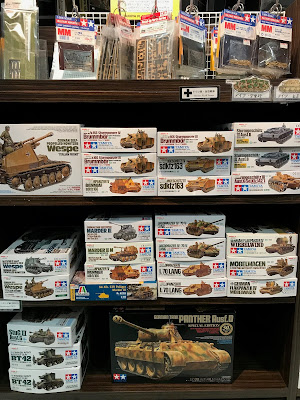
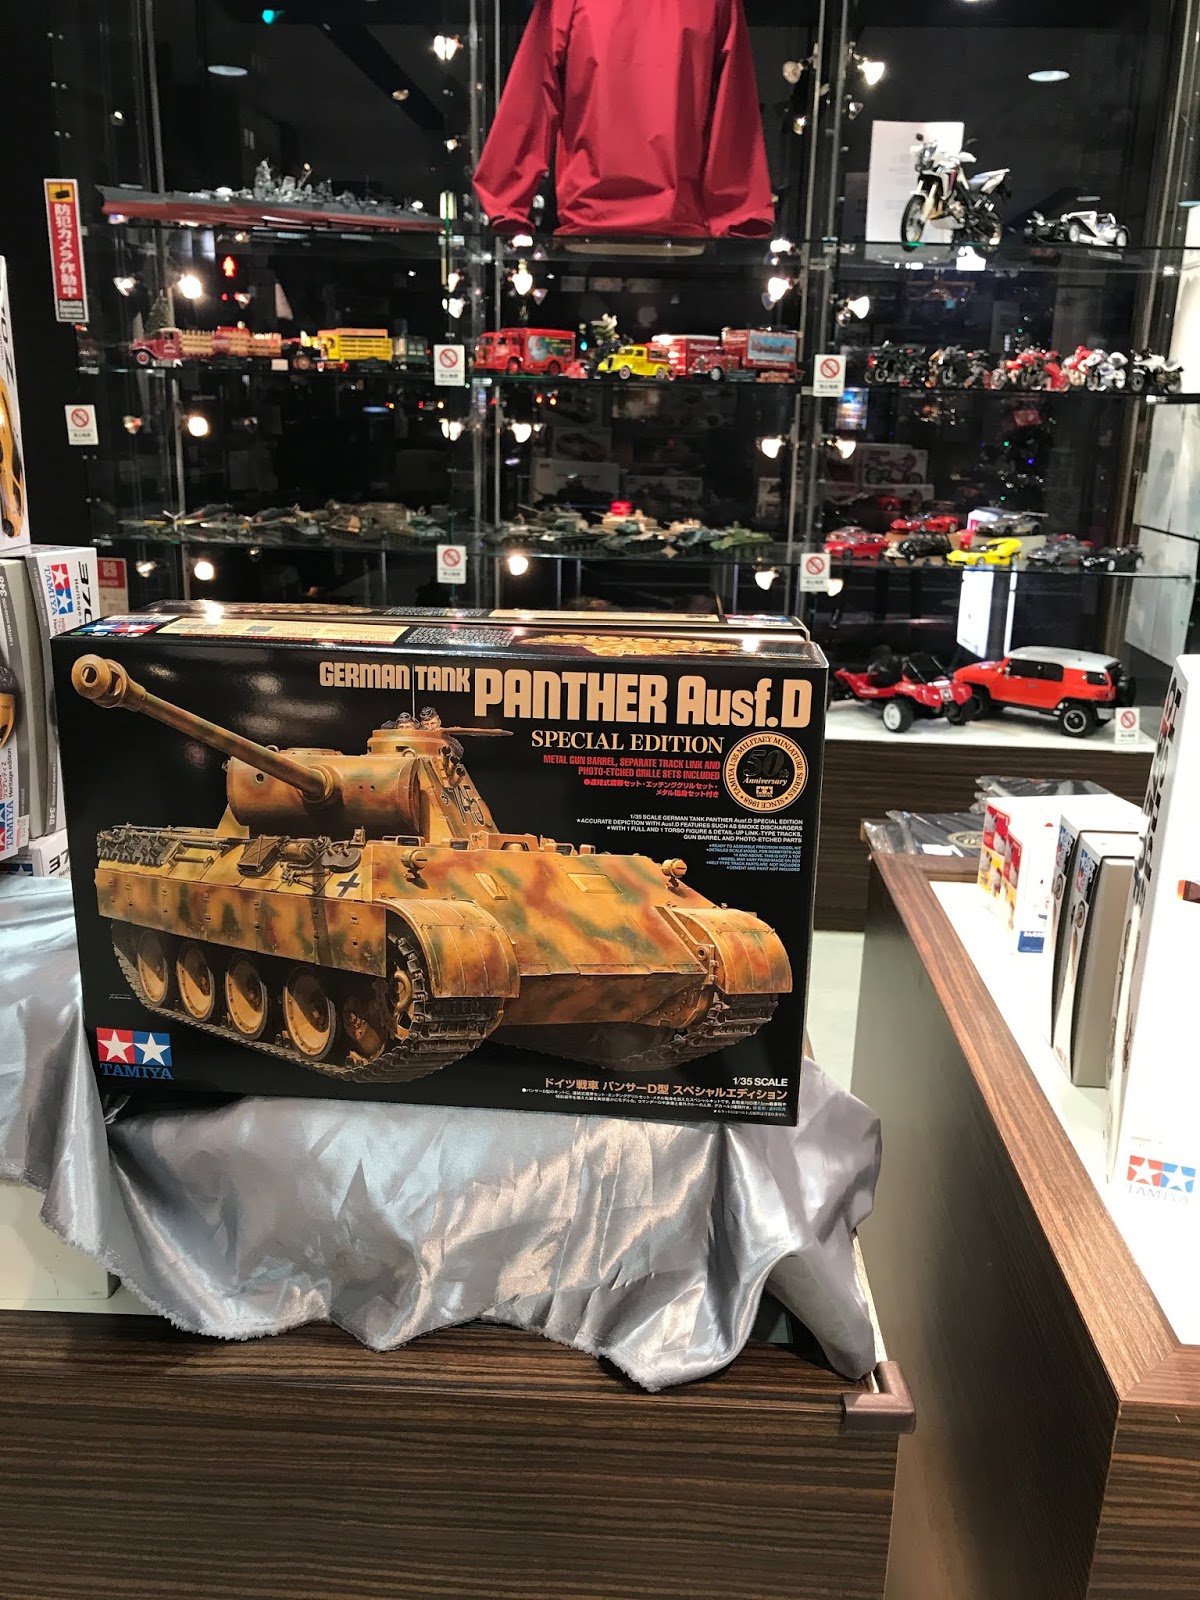
Standing out among the German and Finnish WW2 kits is the 50th Anniversary Panther Ausf.D
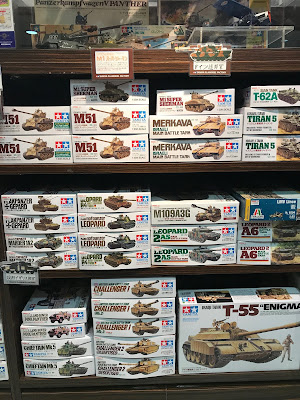
Tamiya 1/35 scale model kits mostly from the modern era
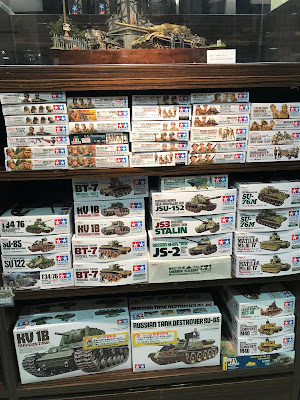
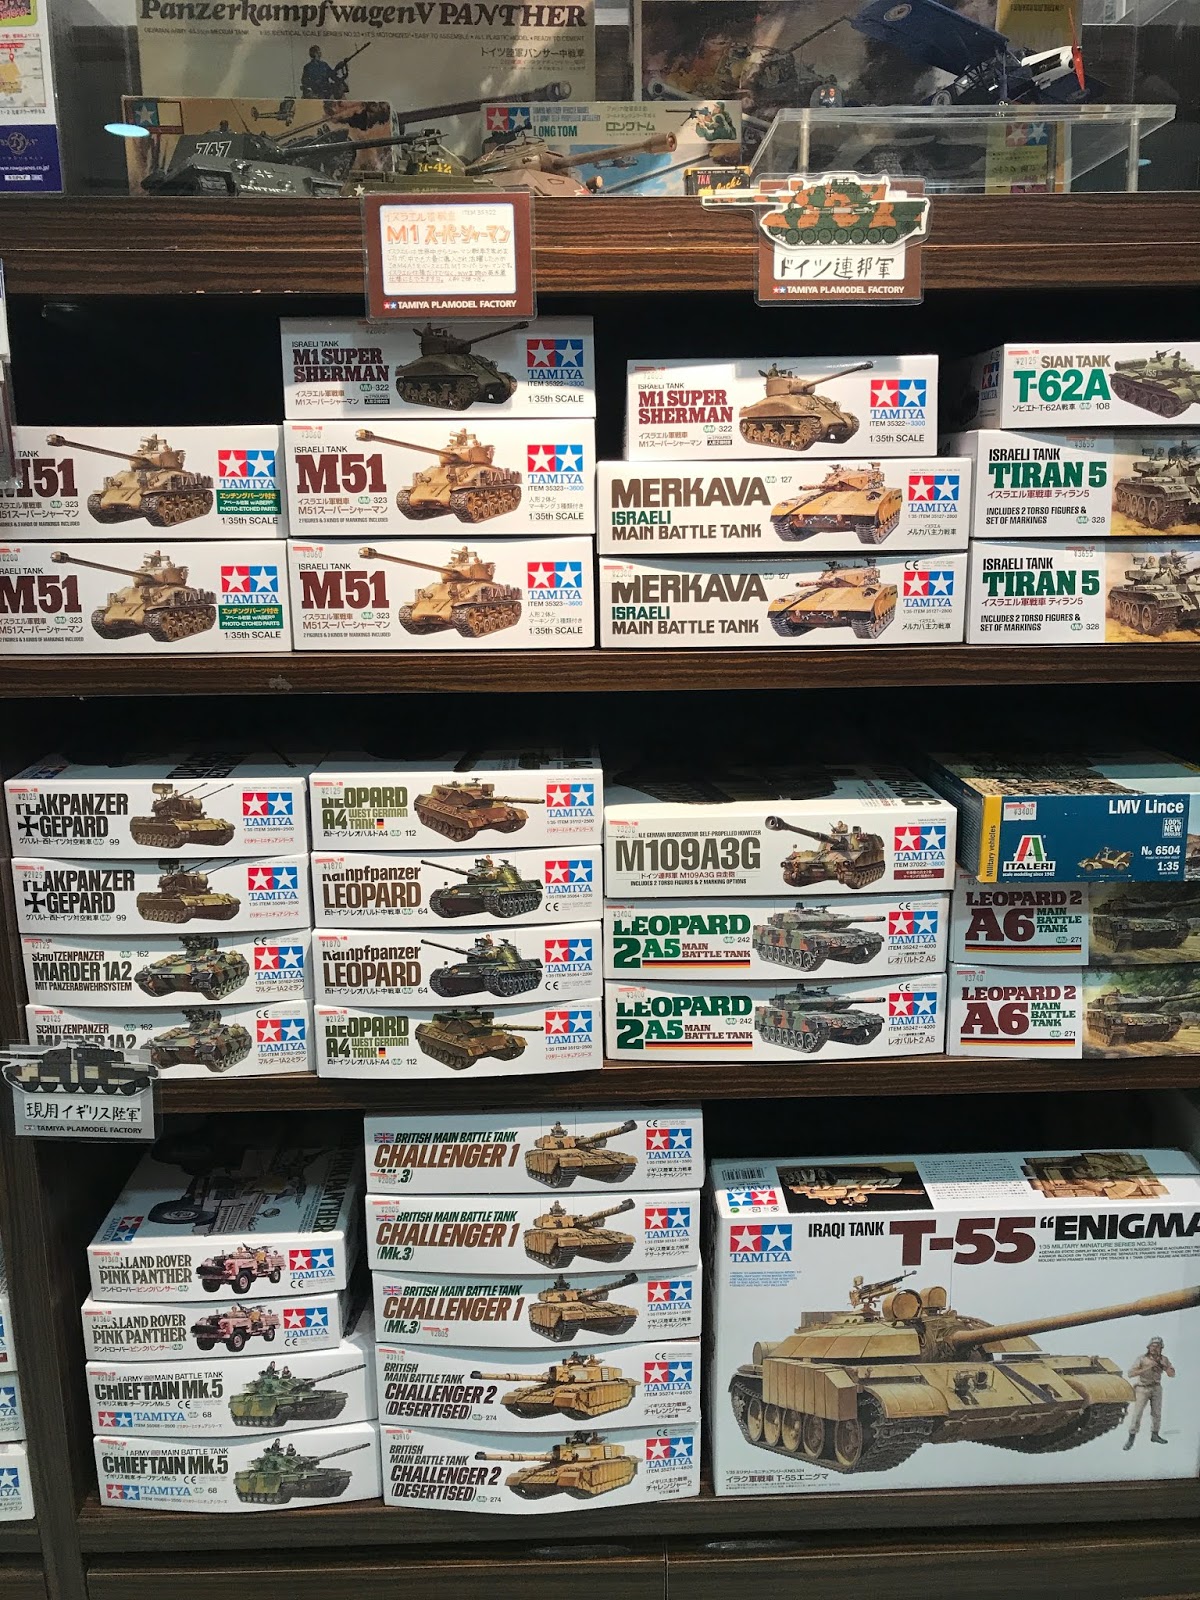
Russia and Italian armor as well as military figure kits
Some 1/35 scale accessory parts, British armor, French armor and soldiers

Well, it was a moot question and the missus knew it. What there anything I wanted? Well, a better question would've been was there anything that I didn't want? Anyway, I recovered my senses soon enough and my initial exhilaration wore off quickly as I grappled with the realities of want versus budget. While the former is insatiable, there is never enough of the latter. So after a fair bit of dilly-dallying with choices made, unmade and remade, I eventually settled on a selection of AFVs entirely from the World War II era. Most were Wehrmacht armor with an iconic Russian tank thrown in.

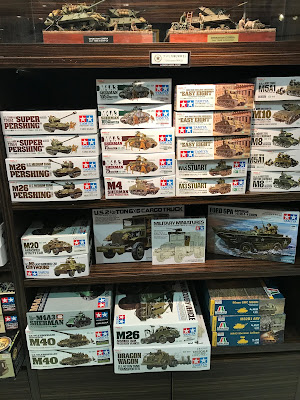
American armor and artillery including the more well known 
M4A3E8 Sherman Easy Eight
Scale model equivalents of vehicles in the Wehrmacht Panzer and Panzergrenadier Divisions
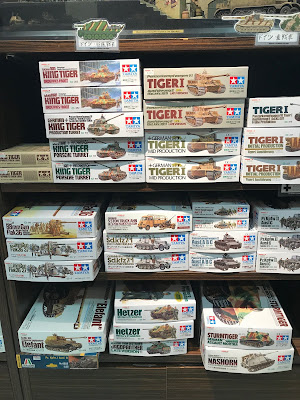
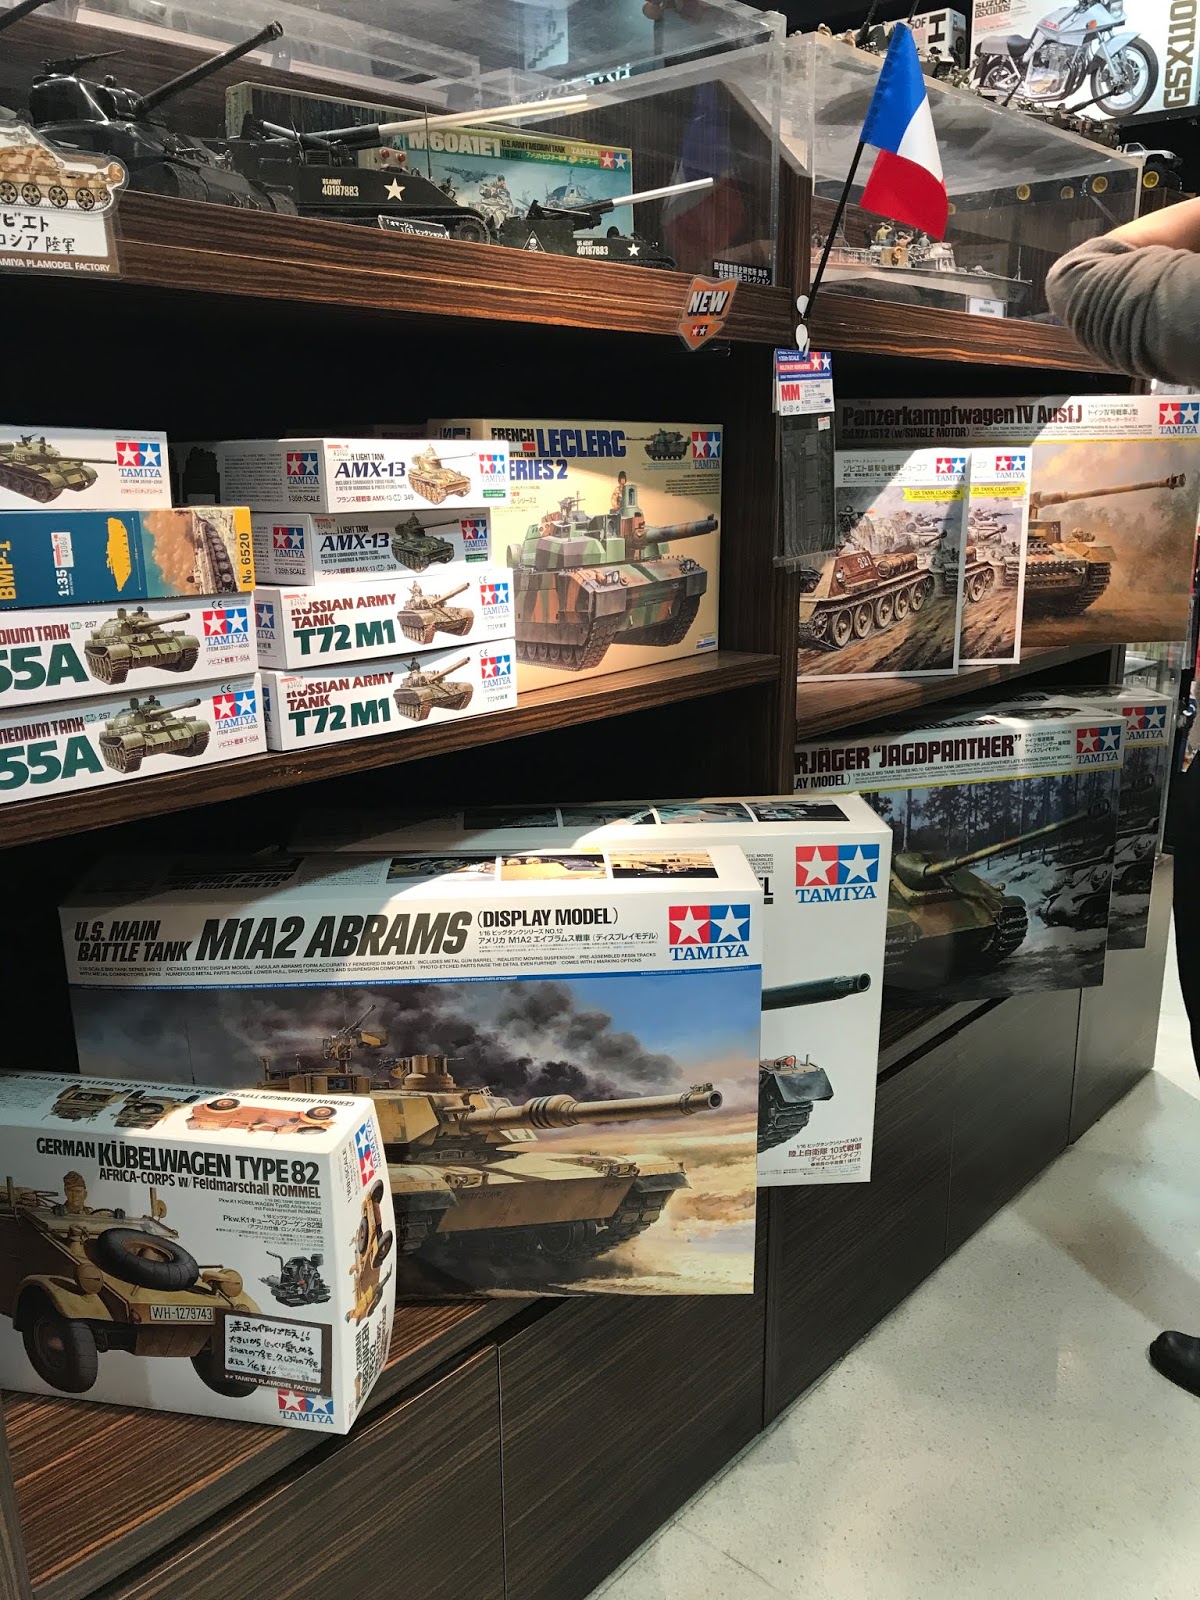
Yet more 1/35 scale German armor including the infamous ... 
1/35 scale Japan Ground Self Defense Force model kits and 1/16 military figures 
On the lowest shelf are Tamiya's large 1/16 scale model kits

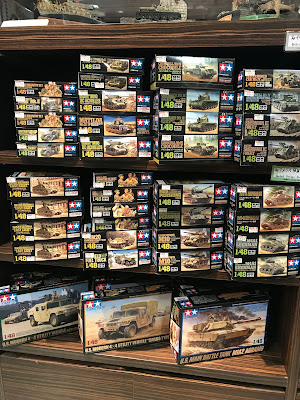
Other than the wide selection of 1/35 scale model kits that were my main focus, there was also a good selection of 1/48 scale model kits in the Tokyo flagship store (see below). But because kits at this slightly smaller scale are pretty rare in the local hobby shops that I frequent, I never really took to building them. I believe Tamiya is one of the (if not) main producers of 1/48 scale military vehicles.   

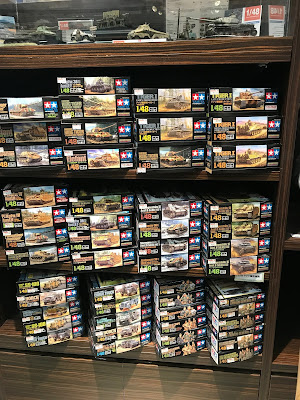
Tamiya Plamodel Factory (Tokyo) has a huge collection of 1/48 scale AFVs
More 1/48 kits and some rare 1/25 scale remote control tanks
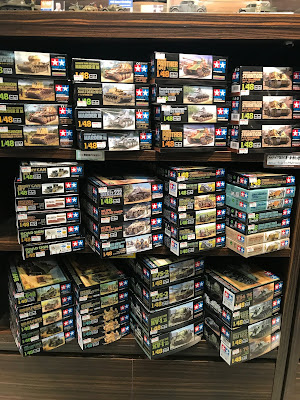
German and Russian 1/48 scale model kits
British and American 1/48 scale model kits
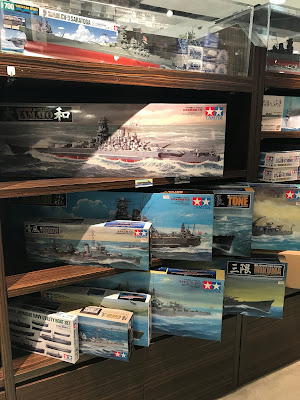
Ships aren't my thing but the Japanese Battleship Yamato was tempting

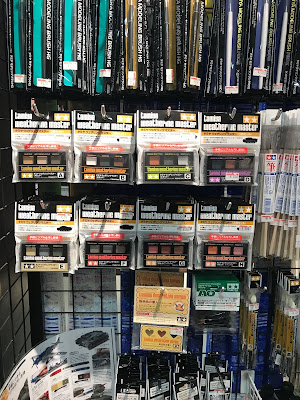
In hindsight, I should've taken a more careful look at the various tools and accessories available in the shop. There were certainly a few stuff I could've used in some upcoming projects. That being said, I don't regret it too much as my priority then was getting my hands on a few hard-to-find kits.

Tamiya paint brushes, weathering master sets and miscellaneous tools
Closeup of Tamiya's premium paint brushes
A wide selection of Tamiya airbrushes
More Tamiya airbrushes and air compressors
Tamiya Electric Handy Drill, which actually needs to be assembled like a model kit
Various types of Tamiya branded glues

In the end, things ended up more expensive than anticipated. It turned out there was a 8% sales tax yet to be included into the final prices on display. Moreover the Tamiya Plamodel Factory in Tokyo was unfortunately a shop that didn't reimburse tourists for the tax. Prior to bringing the kits you see below to the cashier, the missus had actually upon my request returned a number of Russian tanks (i.e. the KV-1B, Su-85 and Su-122) back to the display shelf in order to keep the bill low. And with the added tax I was prepared to return a further two kits to the shelf but she kindly suggested I keep them as it wasn't everyday that she got the chance to visit Tamiya's flagship store.     

What my missus got for me from Tokyo's Tamiya Plamodel Factory

Apart from the Pz.Kpfw.IV Ausf.J 50th Anniversary Special Edition kit, the others came packaged in smaller sizes than your average Tamiya box. Correspondingly, they were cheaper than what an average 1/35 scale Tamiya kit retails for. Now I'm not a Tamiya fanboy by any means but I do appreciate the quality of their kits. So I was extremely happy with her haul in Tokyo, especially the Russian T34/85 Medium Tank. What's more, there was icing on the cake in that the missus bought all of them for me. Talk about having your cake and eating it too, icing and all. Looks like Xmas came early for me. On that note, here's wishing you a Merry Christmas and a Happy New Year.

https://www.facebook.com/FourEyedMonster-313145002078520/

Wednesday 19 December 2018

MENG Model Sd.Kfz.182 King Tiger with Henschel Turret [WIP - Oil Dot Filter Test on Three Tone Camo]

As much as this hobby resembles riding a bike in that we never forget how to do it, there was a slight hiccup when resuming work on the Meng King Tiger after such a lengthy period off. Old bad habits resurfaced and this one bears highlighting again as it's a bane of a lot of hobbyists whether they realize it or not namely impatience. This coupled with the fact that oil dot filtering is a technique I haven't mastered yet meant unsatisfactory results (see immediate photo below). As a comparison, you can see the effect as it was meant to be (see second photo below).  

Oil Dot Filter Technique Test on a German WW2 Three Tone Camouflage

Right off the top of my head I can already pinpoint what went wrong. What was required, and this I knew on an intellectual level, was to slowly blend the oils using a damp-to-dry brush. What I did, in my impatience, was to blend in an overly quick manner with a brush loaded with too much medium. Speaking of medium, I used the Winsor & Newton Artists' White Spirit versus the recommended Abteilung 502 Odorless Thinner which may be a contributing factor. Lastly, my placement and choice of oil colors could've been much better. In the former oil dots were placed too randomly without any consideration of the camouflage color concerned while in the latter I might've used too much black and greys which washed out any tonal variation achieved by the other hues.        

Effect of oil filters on the camouflage when properly applied by expert hands (not mine)

All negatives aside, this oil dot filter test was carried out on a styrene sheet that had been spray painted with a three tone camouflage pattern which in turn was protected by a matte clear coat.  

German WW2 Three Tone Camouflage using Tamiya TS-1 (Red Brown), TS-2 (Dark Green) and TS-3 (Dark Yellow)
Prior to the oil dot filter technique, a matte clear coat was applied to protect the camo basecoat 

While I had recently stocked up on Winton Oil Colours, I ended up using Abteilung 502 oil paints which I had procured from a local hobby shop during a clearance sale. Based the book Mastering Oils Vol.1 by Joaquín García Gázquez, the oil do filter hues recommended for use on a German WW2 three tone camouflage pattern are Snow White, Black, Magenta, Yellow, Payne's Grey, Intense Blue, Olive Green, Raw Umber and Neutral Grey. The first six colors are conveniently found in Abteilung's Base Color Alteration Set while the others were taken from other sets or bought individually.

Paints used comprised solely of Abteilung 502 modelling oil paints
Colors used were based on recommendations found in Mastering Oils Vol.1 by Joaquín García Gázquez

Similar to my previous attempt at the Oil Dot Filter Technique, cardboard pieces were used as a palette in order to absorb excess oil from the paint. For this purpose, I found it sufficient to leave the Abteilung 502 oil paints on the cardboard palette for a few hours in an airtight container.  

Excess oil was absorbed on a piece of cardboard for a better matte finish
Enclosing oil paints in an air tight container prevent them from drying up to fast

Blending of the oil dot paints was carried out using a brush and white spirit. As touched upon briefly, the recommended medium for blending these Abteilung 502 oil paints is actually the namesake's Odorless Thinner. It is supposedly softer and less aggressive than white spirit which in theory would be better for smoother blending. But because one 100 ml bottle of Abteilung 502 Odorless Thinner costs the same as a one liter tin of Winsor & Newton Artists' White Spirit, at least locally, I will be using the latter for my blending purposes for the foreseeable future.  

Dots of varying hues of oil paint were applied onto the camo basecoat ...
... and then blended using white spirit and some brushes
Results were unsatisfactory leaving much room for improvement

Despite this setback I still believe oil dot filters are a must in order to introduce some tonal variation, no matter how subtle, to the hull of a tank. Going forward I plan to apply the oil dot filters on the tank itself before perfecting the technique with further tests as above. Having just come back to the hobby after such a long layoff, I feel it would be better to do things on a trial and error basis on an actual scale model rather than practicing on a piece of painted sytrene. I found that my heart just wasn't really in it for the latter. If I'm not careful I'll likely slip back into the hobby malaise I fought so hard to come out of. So it's on to the King Tiger itself for the next steps even if I mess things up badly.    

https://shireworks.blogspot.com/https://www.facebook.com/shire.works

Thursday 13 December 2018

Big Bad Wolf Book Sale 2018

It's that time of the year again when the Big Bad Wolf comes a-calling to Kuala Lumpur for its annual self-proclaimed world's biggest book sale. After a fantastic outing at the 2016 sale, I had skipped the previous year's sale to give my poor wallet a breather. And with a huge portion of my budget tied up for potential hobby-related stuff in my missus's work visit to Japan (more on this in a future post), I went into the sale with a careful eye on overspending. In the end, I needn't have bothered.  


For me at least, this year's book selection was pretty disappointing with regard to genres I liked i.e. military history, medieval history, art references, fantasy and science fiction. Instead, the sale reverted to form with majority of the books on sale comprising toddler and children books.       


That being said, I still manage get my hands on some gems, some of which were undoubtedly leftovers from the previous sale. I was especially happy to find a copy of Achtung-Panzer! The Development of Tank Warfare by Heinz Guderian as well as Dunkirk: Retreat to Victory by Julian Thompson. I also scored two fantastic DK-Smithsonian visual guides, one on World War II and the other on the Vietnam War. Other military history books I bought were D-Day: Illustrated Edition by Stephen E. Ambrose and Camouflage at War by Martin J. Dougherty. Meanwhile, a historical biography titled Elizabeth of York by Alison Weir rounded up my collection of history books.

Achtung Panzer! by Heinz Guderian and Dunkirk: Retreat to Victory by Julian Thompson
DK-Smithsonian - World War II: The Definitive Visual History
DK-Smithsonian - The Vietnam War: The Definitive Illustrated History
D-Day: Illustrated Edition by Stephen E. Ambrose
Camouflage at War: An Illustrated Guide From 1914 to the Present Day by Martin J. Dougherty
Elizabeth of York: A Tudor Queen and Her World by Alison Weir

Art-related books were even rarer this time around with only one table versus at least five back in 2016. I'm a sucker for anything color related so I was happy to discover Colour: The Professional's Guide by Karen Triedman. It turned out to be the only art book that was of interest to me.

Colour: The Professional's Guide by Karen Triedman

Lastly, a visit to any book sale wouldn't be complete without a look at the sci-fi and fantasy display tables. That too turned out to be a meh experience. I guess that's a tad harsh seeing there were a lot of graphic novels and comics on display. But in terms of fiction, I could only find three of note namely The Year's Best Science Fiction 33rd Annual Collection, The Mammoth Book of Nebula Awards SF and Lock In by John Scalzi. A paltry selection at best but still better than being empty handed.   

Two tomes of science fiction short stories compilations
And lastly ... Lock In by John Scalzi

So all in all, this year's book haul wasn't impressive by any means. On the bright side, this means more hobby budget leftover for the missus's work trip to Japan. That will be a chance to get some goodies that are hard to find back home, luggage space permitting. Well, that's it for this post. If you are already off on your holidays, have a good one. If you're like me stuck at home with no respite in sight, hey, at least we have our scale model kits and miniature figurines to work on. To each his own.

https://www.facebook.com/FourEyedMonster-313145002078520/

Sunday 9 December 2018

HQ12-02 Race Queen [WIP - Applying Tamiya Weathering Pastels as Skin Tone Shadows]

In what is my first sustained art session in three and a half months, I finally resumed work on the atelier iT Race Queen. And after doing nothing for so long, I was happy just to do something, anything, even if it's the bare minimum of applying pastel shadow colors to spaces between the fingers of a 1/12 scale figurine. It isn't much physically. But mentally it's a lot. It's a start.     

Work-in-progress of atelier iT HQ12-02 Race Queen: Pastel shadows applied to spaces between the fingers

Now you might be wondering why don't I just airbrush the shadow colors or paint them by hand on the spaces between the fingers. Well, the spaces are too small for accurate airbrushing while applying lacquer paints by hand brush generally isn't a good idea if you're want smooth transitions. Caught between using acrylics and pastels as an alternative, I decided to give the latter a go and learn a new technique in the process. So first and foremost on the comeback agenda was to find out which of the Tamiya Weathering Master flesh hues most closely resembled the airbrushed skin tone shadows.

Tamiya Weathering Master's peach hue was the closest match to the skin tone shadows airbrushed on the leg

Roughly eyeballing the colors (see above), I found Tamiya's peach to most closely resemble the existing shadow colors that had been airbrushed onto the leg. In keeping with my cautious nature, I decided to test out this assumption first. To do this, I painted up some spoons with Gaia Color flesh mid-tones and highlights (see below). These served as the base for the weathering pastels to adhere to. The point of this little exercise was to see how the pastels would fare as the sole shadow color, when compared to a section of the figurine airbrushed with shadows, mid-tones and highlights. 

For the test, first a mix of mid-tones and highlight skin tones were airbrushed on a spoon
Then, the peach pastel was applied to the spoon using an eyeshadow applicator, thin cotton bud and brush
Spoon with mid-tone/highlight skin tone before weathering pastels (left) and after (right)
Comparison between the shadows using pastels (on spoon) and using airbrush of lacquer paint (on leg)

Results (see above) show there is sufficient likeness between the shadow colors created by airbrush (leg) and by pastel (spoon) to warrant its use for shadow areas in this figurine that cannot be reached by the former. I believe this technique would be effective only at larger sizes of 1/12 scale and above e.g. 1/6 scale. More so when one is painting figurines when shadowed areas can be small.

Before weathering pastels: Note the spaces between fingers which lack depth as airbrush can't reach the crevices
After weathering pastels: Spaces between fingers now have shadow hues (courtesy of the peach pastel)
A final matte clear coat varnish was applied to the hands to seal in the pastels

In the final step, I sprayed on a matte clear coat in order to seal in the pastel application. You could also use a semi-gloss clear coating on the flesh areas depending on the look you want the figurine to have. Much more work remains to be done on the Race Queen's body and skin tone such as her facial features, fingernails, hair, etc. That's what I'll likely concentrate on before moving on to her clothes. It's good to be back though I foresee intermittent delays to any progress I may make hobby-wise seeing that it's the year-end holidays and I've only just got back into the groove. But I'm back.

https://shireworks.blogspot.com/https://www.facebook.com/shire.works

Related Posts Plugin for WordPress, Blogger...